Quantcast
Channel: Sprinkle Bakes
Viewing all 914 articles
Browse latest View live

Apple Pie Caramels for the Etsy Blog

$
0
0

Okay. So maybe I told a little white lie in my last post about holding off on fall baking until my return from the beach (we're still here, and loving every minute!). In my defense, this is candy (which isn't exactly baking, right?) and it's so darn easy to make I had no trouble whipping it up before we scooted off to the Carolinas.

These caramels are bursting with baked apple flavor and truly evoke the essence of fall. Get all the details with step-by-step instructions HERE on the Etsy blog!

Chocolate Chip Cookie Dough Caramel Apples

$
0
0


Lately my home has been filled with the scent of warm vanilla and cooked sugar. I've been making every incarnation of caramel I can think of. I can't help it. It's something I love to enjoy during the fall months. I've been leaving a trail of crumpled wax paper squares everywhere I go. Why do I even bother wrapping homemade caramels, honestly?!

This is a caramel recipe that I've been dying to share. It makes the glossiest, most perfect caramel apples I've ever seen! And, as if that weren't enough to soothe a fierce sweet tooth, I've added a layer of chocolate chip cookie dough.

I regret nothing.


Wrapping the caramel apple in cookie dough is easy. Just make sure the caramel is set before you start. I chose to leave part of the caramel exposed, but you could certainly wrap the entire apple in cookie dough.


Begin by rolling the cookie dough between sheets of wax paper. Chill the dough then cut  into strips. To get a clean line when cutting, don't drag your knife through the dough - the chips will drag and make a very ragged edge. Instead, cut strait down with a sharp knife. This will cut through the chocolate chips and make a more precise edge.

Next, place the dough onto the caramel apple and press it on firmly. The dough will spread around the apple as you press. Tuck the excess dough under the apple.

Serve in cute cupcake papers. Refrigerate leftovers - that's it!

Is it just me, or do these guys kinda look like they're wearing leopard print?

Even if you're not starry-eyed over the cookie dough coating, I hope you'll try the caramel recipe for covering apples. It's one of the tastiest I've tried!

Chocolate Chip Cookie Dough-Covered Caramel Apples

[click for printable version]
Source: SprinkleBakes/ Vintage church fundraiser cookbook
Yield: 12-15 apples
Prep: 45 minutes, total 2 hours

Caramel apples
12 small apples
Ice pop sticks or Birchware forks (shown)
1 can/ 14 oz. sweetened condensed milk (not evaporated milk, these are sometimes confused)
2/3 cup/ 148g. heavy whipping cream
1 cup/ 310g. light corn syrup
1 cup/ 204g. dark brown sugar, lightly packed
1 cup/ 210g. granulated sugar
1/2 cup/ 113g. unsalted butter
1 tsp./ 6g. vanilla extract

Cookie dough
3 cups/ 418g. all-purpose flour
3/4 tsp./ 3g salt
1 1/4 cups/ 273g. light brown sugar, packed
3/4 cups/175g granulated sugar
1 cup/ 226g. unsalted butter, melted and cooled
1 1/4 tsp./ 7g. vanilla extract
1 cup/ 174g. mini chocolate chips
1/4 cup/ 52g. whole milk
  1. Place a large sheet of parchment paper on a work surface, or grease a large jelly roll pan with shortening. Set aside.
  2. Clean and dry the apples well.  Remove the apple stems and carefully punch a guide hole for the ice pop sticks with a knife or skewer.  Insert sticks into guide holes. Lift each apple to make sure each can securely be picked up. 
  3. For the caramel, stir together the condensed milk and heavy cream in a 4-cup measure with a spout. Combine corn syrup, dark brown sugar and granulated sugar in a large pot. Bring to a bubble over high heat. When mixture boils, add butter. Stir until butter is melted and reduce heat to medium-high. Add milk mixture in a small, steady stream while whisking continually so that the caramel keeps a slight boil. Reduce heat to medium and attach a candy thermometer. Bring to 250F. Remove from heat and stir in vanilla extract. Wait until bubbling subsides and the caramel has a smooth, glassy surface that is bubble-free. Tilt pan slightly so the caramel pools to one side. Dip apples and place them on parchment. Allow them to set completely, about 1 hour.
  4. For the cookie dough, stir together flour, salt, brown sugar and granulated sugar in a large mixing bowl. Pour in butter and vanilla extract. Mix until a dry dough forms. Add chocolate chips and mix on lowest speed. When chocolate chips are evenly dispersed, add milk 1 tablespoon at a time with machine on low speed. Turn the cookie dough out onto a large sheet of wax paper. Top with a same-sized piece of wax paper and roll dough to 1/4-inch (or as thinly as the chocolate chips will allow). Chill the dough for 20 minutes then cut  into strips. To get a clean line when cutting, don't drag your knife through the dough - the chips will drag and make a very ragged edge. Instead, cut strait down with a sharp knife. This will cut through the chocolate chips and make a more precise edge.
  5. Next, place the dough onto the caramel apple and press it on firmly. The dough will spread around the apple as you press. Tuck the excess dough under the apple. Serve in cute muffin-sized cupcake papers. Refrigerate leftovers.

Note: the cookie dough application is a very forgiving process. If your dough tears or crumbles, simply pick up dough pieces and patch them onto the apple. The apples can be perfectly and seamlessly smoothed with your hands/fingers.

Rice Krispie Treat Sprinkle Cake - Sprinkle Bakes is Four!

$
0
0

It's a very Happy Blog Birthday!

Today I'm celebrating four years of blogging. Sometimes I look back at the work I've done over these past years and wonder - who did that? Did I really bake all those things? Did I really write a book? And am I really writing another one? Yes!

It's a little surreal getting to do the thing you love every day. It's a blessing. I still can't believe it's only been a year since I quit my day job to pursue Sprinkle-Baking full time. I've never been more grateful for this life I have. I thank you for being part of it. 


This year's birthday cake definitely spreads the sprinkle-love, but it's no ordinary cake. It's made from one of my favorite sweets on the planet - Rice Krispie treats. I whipped up the biggest batch ever (ever, ever!) to make this triple-layer confection. 

It's an easy birthday cake alternative, just make sure to grab your biggest stock pot for the task. I'll admit, it feels a little messy to make (buttering up hands to press the candy into cake pans) but in the end clean-up was a snap. And that's always a good thing!  


To spread even more birthday cheer, I'm giving away a KitchenAid Artisan Stand Mixer in a color I've been crushing on - pistachio!Isn't it pretty? Sigh.


a Rafflecopter giveaway
*This giveaway is open worldwide.


This sprinkle cake is sure to bring a smile with its burst of color, and who doesn't love delicious vanilla-scented marshmallow Rice Krispie treats? It's really fun for something different birthday-wise. Hope you'll give it a try!

Rice Krispie Treat Sprinkle Cake
[click for printable version]

Source: Martha Stewart crispy rice recipe, SprinkleBakes frosting recipe
Yield: One 7-inch triple layer cake or one 9-inch double layer cake
Prep: 45 minutes, total time about 2 hours 30 minutes

10 tablespoons unsalted butter
12 cups/716 g mini marshmallows
2 teaspoons/12 g vanilla extract
13 1/2 ounce box Rice Krispies cereal
Pinch of salt

1 cup/ 220g of unsalted butter, softened
2 1/2 cups/ 275 g confectioners’ sugar - the finest you can find (usually 10x)
2 teaspoons/ 12g. vanilla bean paste or vanilla extract
Milk or heavy cream, optional
2 cups/436g multicolor jimmies
Multicolor Sixlets candies (about 20 pieces) for decoration
  1. Grease three 7-inch spring-form pans or two 9-inch pans with butter; set aside.
  2. For the Krispie treat portion, melt butter in a large pot over low heat (I used my 20 quart lobster pot). Add marshmallow; stir until melted. Add vanilla extract and stir to combine. Add Rice Krispies cereal to the marshmallow mixture. Stir together with a large wooden spoon until all the cereal is coated with marshmallow. Quickly press the cereal into the pans with well-buttered hands. Use a length of wax paper or parchment paper on top of the Krispie mixture to pack it down into the pans. Refrigerate cakes until well chilled and set, about 2 hours.
  3. For the frosting, mix together the butter and confectioners’ sugar in a stand mixer fitted with the whisk attachment.  Begin mixing on low speed until crumbly, and then increase to high and beat for 3 minutes.Add vanilla bean paste (or extract) and beat again for another minute until light and fluffy.  If you find the buttercream is too stiff, you may add milk or heavy cream 1 tablespoon at a time until the mixture is spreading consistency.
  4. Transfer 1/3 cup frosting to a piping bag fitted with a large star tip; set aside.
  5. Unmold Krispie treat cakes from the spring-form pans and frost the tops of two cake layers. Stack layers with the unfrosted layer on top; gently press layers together. Pour jimmies into a baking pan with a lip and spread evenly. Frost the sides of the cake with buttercream using an off-set spatula and roll the sides of the cake in the sprinkles. Hold the stacked cake at each unfrosted end as you turn and roll. Stand cake upright in the baking pan. Frost top of cake and sprinkle on jimmies. Press handfuls of jimmies into the top of the cake to coat completely. Allow the excess to fall back into the baking pan.
  6. Transfer the cake to a cake stand or serving platter using a large metal spatula or cake lifter.  Pipe stars along the top edge of the cake with the reserved frosting in the piping bag.  Place a Sixlets candy in the center of each piped star.  If birthday candles are being used, pipe more frosting onto the center of the cake and stand candles upright in the frosting. Let cake come to room temperature before cutting. Use a large chef's knife to cut the cake into slices.


Corpse Bride Blue Velvet Cake - Complete Tutorial

$
0
0

HelloOctober!  This month brings out the kid in me like no other (even more so than Christmas!), and I get positively giddy for all things spooky. This year I decided to start celebrating early with a Halloween cake project. I'll admit - I got carried away with this tutorial. There are tons of step-by-step photos and lots of instruction for all the tiny details - it's almost like a mini e-course in gum paste sculpture. It's probably the biggest tutorial in all of Sprinklebaking history!

As you may know, I love Tim Burton's stop-motion-animation characters (remember my Sparky cake from last year?) and I've recently re-watched Corpse Bride. I have a huge soft spot in my heart for the main character, Emily, so I decided she needed to be cake-ified in blue velvet and chocolate frosting.

(Spoiler alert!) I mean, if she can't have true love she should at least have chocolate frosting. It's kind of the same thing, right?


Ready to see how I made her?

Materials 
1/2 lb. ready-made gum paste tinted blue with Wilton sky blue gel food color and a dot of black food color
2 white Sixlets candies
Blue pearl dust
Silver pearl dust
Black gel food color
White liquid food color
Pink gel food color
Artist's brush with a fine tip
Light corn syrup
Plastic pointed fondant tool or unused wood cuticle stick
1/4 lb. ready-made black or dark chocolate fondant
White nonpareils
Blue velvet cake baked in 9x13 sheet (recipe link)
1/4 lb. ready-made chocolate fondant
1/2 lb. ready -made red fondant
1/2 lb. ready-made white fondant
18-20 Sixlets black pearls
Royal blue food color
White pearl dust
1 sheet rice paper or wafer paper
Blue food coloring marker
1/8 lb. white gum paste
Toothpicks
White flower or snowflake confetti quins
Royal blue gel food color


As I worked and compared images of Emily to my sculpture, I found her head to be very skull-like, which makes sense -she's dead after all. And her nose is teeny-tiny! A Michael Jackson-sort-of-nose, except twice as small, if you can imagine that. Her big round eyes are an important detail, and white Sixlets candies are a perfect uniform size. You can find them at bulk candy shops online and in some craft stores in the baking aisle.

Head instructions
1. You'll start with a large gumball-sized piece of the blue tinted gumpaste.
2. Pinch one end to a point to form a chin shape.
3. Press the two white Sixlets candies into the paste about 1/3 of the way down from the rounded end.
4. Turn the head to the side.
5. Make a diagonal line across the side of the head from the top third downward to the chin with a paring knife.
6. Cut the bottom piece away leaving a teardrop-shaped head. It should be about 2 1/2-inches from forehead to chin.
7. Place the head cut-side down.
8. Holding the fondant tool horizontally, (you could also use the handle of a small artists' brush) roll it between the eye holes to create a slight slope for the nose.
9. Press the fondant tool's end on either side of the nose slope just under the eye holes to create a flat cheek area.
10. Push the pointed end of the fondant tool upward at the bottom of the nose slope.
11. Make two tiny nose holes in an upside down "v" shape with the pointed end of the tool.
12. Just below the nose, delineate the mouth with the pointed end of the fondant tool. Use the blue pearl luster powder and a dry artist's brush to shade the eye holes.
13. Replace the eye. Add a dot of corn syrup to each candy before pressing them in if they do not want to adhere naturally. Shade the sides of the head with the blue pearl dust. Delineate eyebrow lines on the forehead with pointed end of the fondant tool.
14. Using the fine-tipped artists' brush, paint one small dot on each of the Sixlets candies. Allow them to dry for 5-10 minutes.
15. Further shade above each eye with the blue pearl dust. Shade all the way up to the eyebrow lines.
16. Paint on the eyebrows using black gel food color and a fine-tipped artists' brush.
17. Lightly "sketch" lips around the mouth line using the pointed end of the fondant tool.
18. Paint lips using a small artists' brush and pink gel food color mixed with a drop of white liquid food color. Allow head to stand until dry.

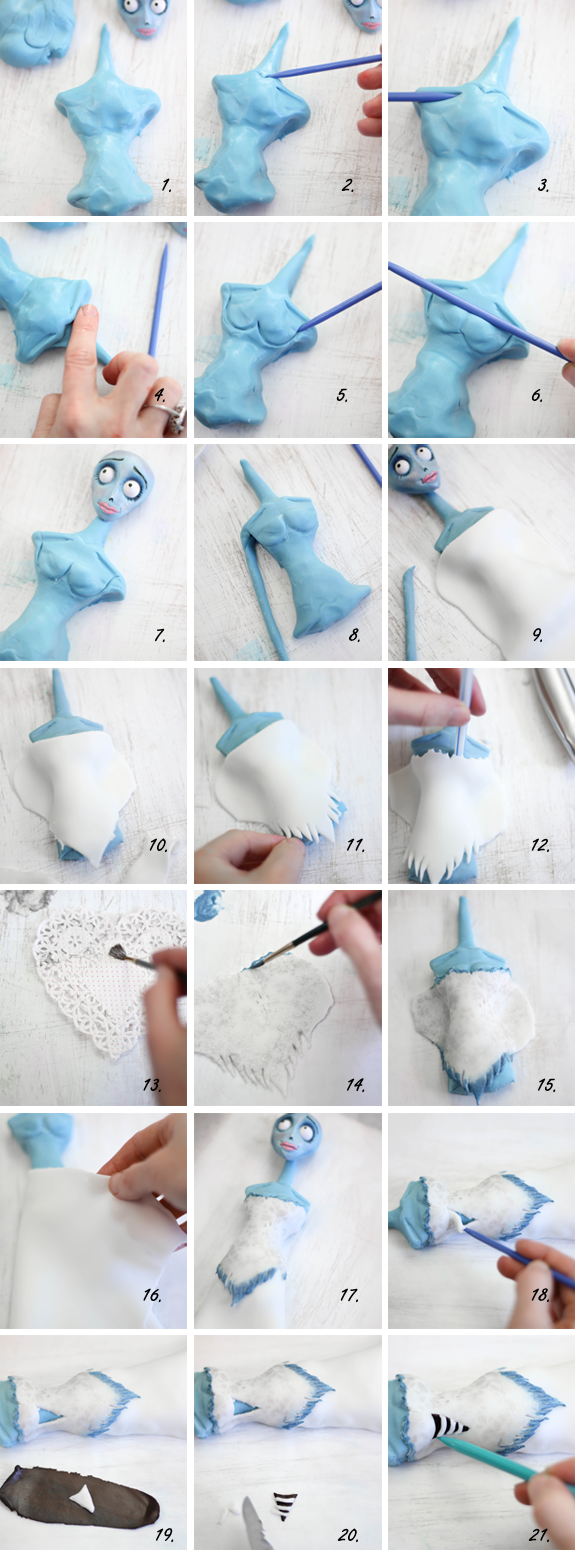
The torso. Admittedly, things will look a little strange in the beginning. The most important part of the torso is the décolleté. Emily is extremely withered and thin and one of her most defining features is very prominent collar bones. As you sculpt this  part of the body, think of its shape as a coat hanger. The rest of the torso will be covered with a dress made of fondant, so don't worry as much about the detail on the rest of the body.


Body instructions
1. Use about 1/8 lb. of the blue tinted gum paste for the torso; roughly shape it into a 4-inch rectangle. Keep the head on your work board to keep in mind he correct body proportions. Roughly sculpt a waist by squeezing the gum paste rectangle in the center. Shape shoulders with your fingers and pull a long piece of gum paste up from the middle of the shoulders, creating a very long neck. The end sculpture of the neck and torso should measure about 5 to 5 1/2 inches in length.
2. Make a "v" shape at the base of the neck using the fondant tool. This indicates where the sternum and collarbone meet.
3. Press the pointed end of the fondant tool into the gum paste just under each shoulder. The pointed end should be facing inward toward the center of the chest. These indentations create the prominent collar bone.
4. Smooth the neck area away from the collar bone using your fingers. Gently press so that the collar bone becomes more prominent.
5. Create two "cups" using the pointed end of the fondant tool. Start at one shoulder at the collar bone and end at the opposite shoulder.
6. Holding the fondant tool horizontally, roll it downward from the collar bone to create a slope on the breast.
7. Periodically check the head in proportion to the rest of the body. Here I've pinched the waist and hips in a little smaller.
8. Roll a piece of blue gum paste into a long rope. This will be the arm. Orient the arm to the body to check for the correct thickness. Her arms are bone-thin, so make sure the rope is, in turn, very thin. Remove the arm from the body and set aside for later use.
9. Roll a out a small piece of white fondant to 1/8-inch thickness, large enough to cover the body.
10. Cut the bottom of the fondant piece into a large "v" with the point resting just below the bottom edge of the torso.
11. Fringe the "v" with scissors or a small knife.
12. Use the end of a straw to cut away small half circles from the top of the dress. Keep in mind that her dress has a sweetheart neckline.
13. I used a paper doily to cover the fondant piece, and then I dry-brushed on some silver pearl luster dust to create a lacy effect. This is optional.
14. Mix blue pearl dust and a few drops of water to create an edible wet paint, and brush it on the top edge of the sweetheart neckline and on the bottom fringe. Allow this to dry for a few minutes.
15. Lay the fondant piece over the torso to make sure paint and lace shading looks acceptable. Remove and touch up any bare spots on the bodice if needed.
16. Roll out a 12x12-inch piece of white fondant to 1/4-inch thickness.Wrap this piece around the torso piece at the waist so that the bottom of the fondant flares out slightly. Cut away excess white fondant if necessary. Use fondant scraps to pad dress to about 3-inches below the torso.
17. Wrap the bodice around the torso. Secure with a dot of corn syrup if needed.
18. Cut out a small rectangular piece from the left side of the bodice just under the breast. Reserve the removed piece.
19. Use the reserved white triangle piece as a template to cut out a same-size piece of black fondant.
20. Cut the reserved white triangle piece into pieces horizontally to make "ribs". Attach them to the black triangle using a tiny dot of corn syrup to adhere, if needed (mine stuck on without syrup).
21. Fit the "ribs" triangle into the hole in the bodice. Press with a fondant tool to secure.


The blue velvet batter was baked into a 13x9-inch sheet cake. It's easy enough to cut into a coffin shape free-hand, so I didn't use a template. I used chocolate icing to coat this cake, but you could use cream cheese if you want to go the traditional route as with red velvet cake.

Cake covering instructions
For the fondant covering, I used red ready-made fondant kneaded with a little black fondant to give it slightly less "cheery" color. Measure the cake and then cut a same-sized piece of the red fondant to fit the top of the cake (roll to 1/4-inch thick, as per usual). Score quilt lines into the fondant using the back of a knife - just make a line, don't cut all the way through. Place a black Sixlets pearl on each point that the lines intersect. For the wood plank sides, roll chocolate fondant to 1/4-inch thickness. Measure sides of cake and cut chocolate fondant strips to stand about 1/2-inch taller than the top of the cake. Striate chocolate fondant pieces down the length of the strips creating a wood grain appearance. Press them onto the icing on the sides of the cake. Let cake stand while you finish the Emily sculpture.


Emily's arms and legs were probably the hardest elements for me to figure out. I wondered how on earth I'd make something so delicate-looking that would actually hold together without an armature. In the end I had a little help from toothpicks.

Veil, bouquet, arms and legs instruction
1. Her veil is made from a single sheet of edible wafer paper. You can find this at cake supply shops or order a few sheets online. In the movie her veil is worn and ragged with age, so it can be cut into an organic shape without using a template. The only guideline I can give is to cut it about 8-inches in length.
2. Dry brush the edges of the veil with blue pearl luster dust. Draw "stitchings" of curlicues around the edges of the veil with the blue food color marker.
3. Lay the veil on the cake, then lay Emily's body on top of the veil. The bottom of the dress should hang off the bottom edge of the cake.
4. For Emily's skeletal leg, roll a length of gum paste into rope. Cut away a three-inch long piece and gently roll between your palms so the piece is uniform.
5. Cut a small slit into each end of the piece, creating the appearance of bone ends.
6. Roll a much thinner 3-inch piece of gum paste and attach it to the side of the larger bone using corn syrup. Let dry.
7. Roll a small dime-size piece of blue gum paste into a ball, then pinch one side flat so that it fans out. Lay this piece over the bottom of the leg bone, covering a bone end.
8. Wrap the piece around the leg bone and pinch closed on the back side.
9. Scrunch the piece down, so that it has the appearance of a slouchy sock around the leg bone.
10. Wrap a small scrap piece of white fondant around the bottom of the "sock" to form a white shoe.
11. Shape the toe into a point.
12. Fashion a small piece of white gum paste into a 1/2-inch bone end and thread it onto a toothpick. Roll a small scrap piece of gum paste into a ball to form a knee bone and thread that onto the toothpick also.
13. Finally, thread the large leg bone onto the toothpick so that the knee bone butts up against it creating one long skeletal leg, about 5-inches in length.
14. Attach the leg by inserting the toothpick end into the fondant under the dress. I don't have a pictorial for her other leg, but you'll essentially make a long rope (about 5-inches) out of blue gum paste, and then attach the white shoe portion as before with the skeletal leg. Insert a toothpick into the top of the leg and then attach it under the dress as before.
15.To make the skeletal hand, roll a small scrap of white gum paste into a ball and then flatten in with your palm. Make 4 slits to fashion "fingers" in the gum paste.
16. Trim fingers so they are slim and cut them in graduated finger sizes.
17. Create a the lower arm bones in the same way the lower leg bone was created, except make it smaller, about 1 1/2 inches in length. Attach the hand to the bone using a toothpick.
18. Her bouquet wrap is made using a small square of gum paste.
19. Wrap the square into a cone shape. Use a dot of corn syrup if the cone does not hold together naturally.
20. Shape the fingers of the skeletal hand around the cone, and then remove and set the hand aside.
21. Place a drop of corn syrup on a piece of wax paper and cover the syrup with flower or snowflake confetti quins. Stir the corn syrup and quins together using a fondant tool.
22. Pour a little silver pearl dust over the quins and spread the dust with a dry brush.
23. Scoop up the quins with a small spoon and pour them into the bouquet cone. Let this set until the "flowers" are set and stable enough to move without them falling out.
24. Create an upper arm bone about 1 3/4-inches long and adhere it onto the veil with corn syrup beside the  left shoulder (your right, her left). Place the forearm upright so that the hand rests on her bodice. Place a dot of corn syrup on the "elbow" portion of the skeletal forearm to adhere it to the veil. Place a dot of corn syrup on the back side of the bouquet wrap and place it under the skeletal hand.
25. Make a hand out of blue gum paste as before with the skeletal hand.
16. Roll out a 1 1/2-inch length of white gum paste and attach the blue hand to the gum paste using a toothpick.
27. Press the white gum paste onto and around the long blue arm. Use a tiny triangle of gum paste over the hand to create the illusion of a bridal glove. Use corn syrup or a tiny dot of shortening to make it stick. Place a dot of corn syrup on the underside of the arm and lay it beside the body on the veil. Butt the top of the arm against the shoulder.


Emily's hair. It's kind of a mess, but that only helps with the execution of this detail. It doesn't have to be perfect. The more ragged, the better!

Hair instruction
1. Begin with a large gumball-sized piece of fondant that has been tinted royal blue.
2. Pull the piece into a long 6-inch length. Attach it to the head with a little corn syrup at the center.
3. Emily has a slight side part to the left, so make the part line first using the pointed end of the fondant tool. Make hair striations down the length of the royal blue fondant piece.
4. Increase pressure as you move the tool down the length of the hair so that the bottom portion of the "hair" is fringed. Place Emily's head on the neck and arrange the hair around her face and over her shoulders.
5. To make her floral head piece, roll out a skinny rope piece of scrap fondant or gum paste, about 4-inches long. Brush it with silver pearl dust. Place dots of corn syrup in the center of the rope and sprinkle over confetti quins. Brush the quins with more silver dust.
6. Wrap the head piece around the top of her head. Press it gently so it adheres. Let stand until set and stable.

A few more details to consider.
I tore the fondant at the bottom of her dress so that it looks worn. I also dry brushed the bottom edges of the dress with blue pearl dust. And don't forget to add the slit in the front of her dress, too. This exposes her skeletal leg - a very important detail! I added a few curlicue stitchings around the bottom of her dress with the blue food marker - this matches the stitching on her veil.
Emily has some decay on one side of her face, exposing some of her teeth. I painted this on with a fine artist's brush and black gel food color.
I used some ready-made royal icing white roses around the sides of the cake board. If I were to repeat this project, I might use some black drippy candles around the coffin. I think that might look even better!


So, how long did it take for all this sculpting and baking? Around 8 hours total spread over the course of two days. Five hours were used on the first day for sculpting most of the figure and baking/covering the cake. The remaining hours were spent figuring out the skeletal leg and scrutinizing some finishing touches. Writing this tutorial probably took longer than the making of the entire cake!

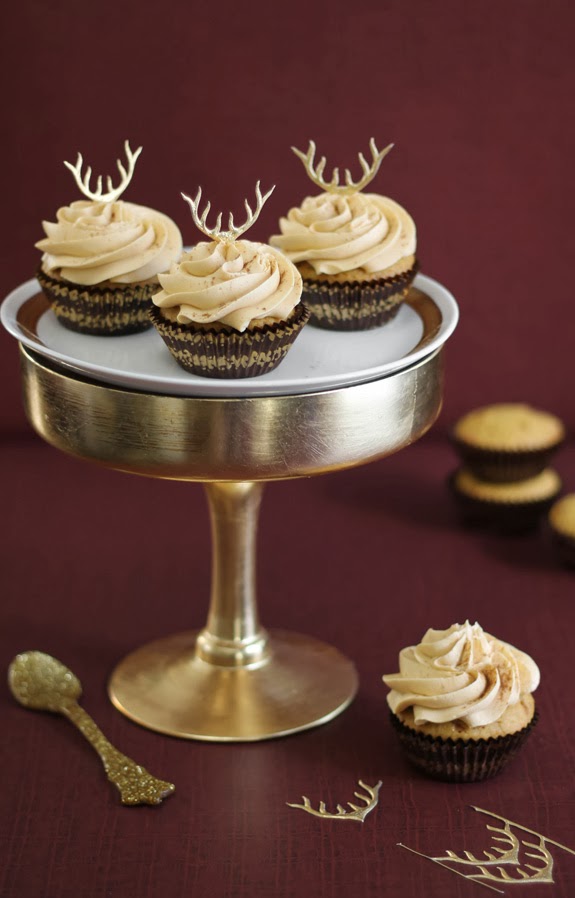
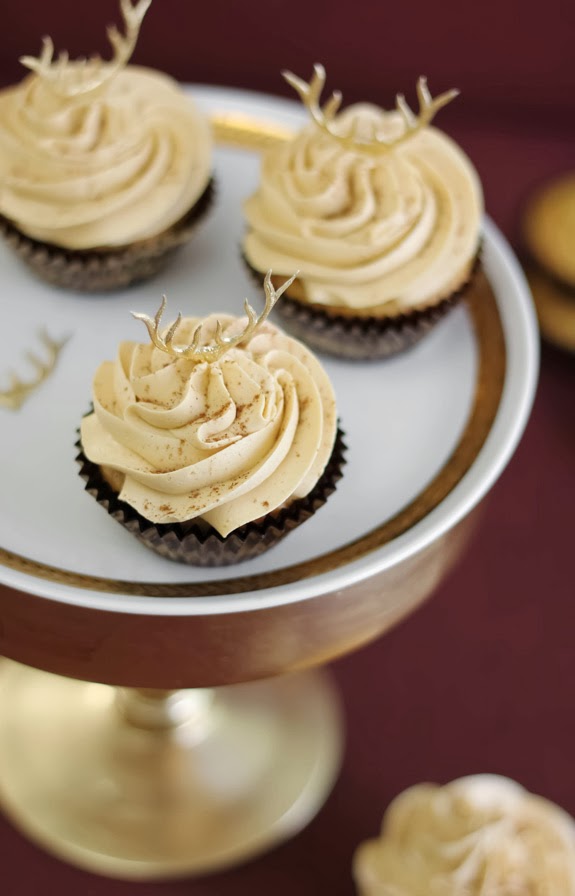
Even if you don't make the cake, I hope you've enjoyed seeing my process. The blue velvet cake recipe can be found here (in cupcake form). I promise it's just as delicious as red velvet!

Happy October, friends!

Pumpkin Tassies with Salted Bittersweet Chocolate Drizzle and a Fair Trade Giveaway!

$
0
0

The past weekend was spent picking out pumpkins for every purpose - sugar pumpkins for roasting, mini pumpkins for the mantel, great pumpkins for carving and one little white pumpkin just because. The next logical step was to make a delicious pumpkiny something, and these pumpkin tassies were just the treat. They're like mini pumpkin pies, but better!


Better because they're drizzled with chocolate - and not just any old chocolate, Guittard, a Fair Trade chocolate!

October is Fair Trade month, and the kind folks from the nonprofit organization reached out to me to help spread the word. So, what is Fair Trade?

"Fair Trade goods are just that. Fair. From far-away farms to your shopping cart, products that bear our logo come from farmers and workers who are justly compensated."

Knowing that will make your chocolate taste even sweeter!


And that brings me to another sweet thing. They're giving away a goodie bag of Fair Trade products to one Sprinkle Bakes reader. Inside is a selection of teas, coffees, chocolate bars, lip balms and a cute canvas tote to help spread the message.

Contest is open to US residents.

a Rafflecopter giveaway


There are all kinds of good things to learn about Fair Trade on their website here, and I really loved the simplicity of the message in their new PSA. Take a moment to see how you can make a difference!

I hope you'll try the pumpkin tassies, too. I love the crust-to-filling ratio (I'm a crust girl!) and they are exactly two bites apiece, which means you should eat at least four in one sitting.

Pumpkin Tassies with Salted Bittersweet Chocolate Drizzle
[click for printable recipe]
Yield: 24 mini pies
Source: Adapted from Cooks.com
Prep: 20 minutes, total time with chilling and baking 1 hour 45 minutes

You'll need a 24 cavity mini muffin tin for this recipe.

Crust
1/2 cup/ 113g unsalted butter, softened
3 oz. cream cheese, room temperature
1 cup/ 125g all-purpose flour
Pinch of salt

Pumpkin filling
1/2 cup/ 132g pumpkin puree (canned packed pumpkin puree is fine)
1/4 cup/53g granulated sugar
1/4 cup/ 60g heavy cream
1 large egg
1 teaspoon/ 2g pumpkin pie spice

Topping
2 oz. bittersweet chocolate, melted
Fleur de sel
  1. For the crust, combine the butter and cream cheese in a large bowl. Mix using an electric hand mixer on low speed until just combined, about 5 seconds. Don't overwork dough or it will greatly shrink during baking. Mix in half the flour and pinch of salt on low speed until crumbly. Mix in remaining flour until well combined. Cover and refrigerate for at least 1 hour.
  2. Preheat oven to 350F. 
  3. Remove dough from refrigerator and knead one or two times. Shape into a 6x4-inch rectangle. Cut dough into 24 cubes. Press each cube into a mini muffin cup. Use your fingers to press the dough up the sides of the cups making the crust edges as tall as the top of the muffin cup. Refrigerate filled muffin tin while you prepare the filling.
  4. In a medium bowl mix together the filling ingredients using the electric hand mixer on medium speed. Filling will be very liquid. Remove muffin tin from refrigerator and divide the filling between the crusts (I used a 1/4 cup measure with a pour spout). Bake for 5 minutes at 350F then reduce temperature to 325F and bake for 10 more minutes. Tassies are done when the filling is set, and it shouldn't jiggle when you move the pan.
  5. Let pies cool completely in the pan. Place a wire cooling rack over a length of wax paper. Transfer tassies to the cooling rack. Place melted chocolate in a zip-top bag with a very tiny hole snipped in the corner. Pipe chocolate onto the tops of the pies in three to four quick passes over each pie. Top with fleur de sel just before serving.

Pumpkin Butterscotch Chip Cupcakes

$
0
0

Every time I opened the refrigerator this week I had leftover pumpkin puree staring me in the face. It wasn't enough to make a pie, and it was too much for another round of these. When you take the time to roast your own pumpkin for puree you hate to see it wasted. Something had to happen, and soon.

Happily, I discovered these pumpkin cupcakes. They take exactly 3/4 cup of pumpkin puree to make, which was exactly the amount I had left over -yes! I decided to add butterscotch chips to the batter because, well, I am so (inexplicably) into butterscotch these days. I looked around for a good butterscotch frosting recipe but they all used brown sugar and a long list of various and sundry. I cheated a little and made the frosting with melted butterscotch chips. It worked! And it's mighty tasty, too.


How cute are these little antler Dresden trims? I found them on Etsy. I was saving them for a Christmas post, but the warm gold foil convinced me that they belong to autumn and pumpkin butterscotch cupcakes.


I'm totally smitten with this flavor combination. There's something so cozy about pumpkin spice cake with butterscotch chips floating around inside. And the butterscotch frosting - it's too easy. It's cheating in the best way possible!

Pumpkin Butterscotch Chip Cupcakes
[click for printable version]
Source: Joy of Baking cake recipe, Sprinkle Bakes original frosting
Yield: 12 cupcakes
Prep: 20 minutes, total time 45 minutes

Cake
1/2 cup/ 113g unsalted butter
1 cup/ 200g granulated sugar
2 large eggs
1 teaspoon/ 5g vanilla extract
1 1/2 cups/ 195g all-purpose flour
1 teaspoon baking powder
1/4 teaspoon/ 1.5g baking soda
1/2/ 2g teaspoon salt
2 teaspoons/ 8g pumpkin pie spice
3/4 cup (180ml) pumpkin puree (canned is fine)
1/2 cup/ 100g butterscotch baking chips roughly chopped

Frosting
1 cup/200g butterscotch chips
1/2 cup plus 2 tablespoons/ 140g unsalted butter, softened
1 1/2 cups/ 175g confectioners sugar
Pinch salt
  1. Preheat oven to 350F.
  2. In a large bowl, beat together the butter and sugar with a hand mixer. Add the eggs one at a time. Beat in the vanilla extract. In a separate bowl, whisk together the flour, baking powder, baking soda, salt and pumpkin pie spice. With the mixer on low speed add the flour  mixture and pumpkin puree to the butter mixture, alternating in three additions, beginning and ending with the flour mixture. Mix in chopped butterscotch chips on low speed. Scrape down bowl and mix again. Fill muffin cups about 3/4 full and bake for 18-20 minutes or until the cakes bounce back when pressed in the center.
  3. For the frosting, melt butterscotch chips with 2 tablespoons (27g) butter at 30 second intervals in the microwave. Stir well between heating. Butterscotch chips will be thicker than semisweet chips when melted (even with the addition of butter), so don't overheat or chips will scorch; just stir and mash chips together with the butter until no lumps remain. 
  4. Combine melted butterscotch mixture and 1 stick (113g) unsalted butter in a large bowl. Mix on high speed with an electric hand mixer. Add confectioners sugar in two additions. Add pinch of salt. Beat on high speed until light and fluffy. If mixture is too thick, add milk 1 tablespoon at a time until it's piping consistency. Transfer frosting to a piping bag fitted with a large star tip. Pipe frosting onto cooled cupcakes. 


Biscuit's Pumpkin Biscuits

$
0
0

Hi friends! I'm updating with a quick little post to wish my best buddy Biscuit a Happy Birthday! He's the most funny, spirited, mischievous little dog I've ever had. Everything he does borders on ridiculous! He definitely helps me to not take life too seriously, and I appreciate that.


I like to keep wholesome treats on hand for the pups, and these pumpkin biscuits are just that - plus they're easy-peasy to make. The honey glaze I brush on them during baking makes them extra tasty, and the boys always scarf them down!


Nerds.
I use chamomile tea in this recipe, but you could substitute hot water if you don't have any tea on hand. You'll only use a few tablespoons, but I like to brew a 12 oz. cup anyway. That means I get to enjoy the remaining tea while making the treats.

Well, we're off to have a little more backyard playtime in the cool fall air. Happy 5th birthday to my little sweater-wearing clown!

Biscuit's Pumpkin Biscuits
[click for printable version]
Yield: 2 dozen 2-inch dog treats
Source: SprinkleBakes original recipe
Prep: 10 minutes, total time 55 minutes

1/2 cup pumpkin puree
3 eggs
Pinch of salt
2 1/2 cups whole wheat flour
3-4 tablespoons brewed chamomile tea, divided
1 tablespoon honey

  1. Preheat oven to 350F.
  2. Place pumpkin puree, 2 eggs and pinch of salt in a large bowl. Mix with an electric hand mixer on low speed until combined. Add the flour and mix again on low speed. Mixture will be very dry and crumbly. Add brewed chamomile tea 1 tablespoon at a time and beat on low speed until a non-sticky workable dough is formed. Knead until all the flour has been absorbed. Roll into a ball and place on a sheet of parchment paper; flatten dough slightly with hands. Cover dough with another sheet of parchment and roll to 1/2-inch thickness. Remove top sheet of parchment and cut out biscuits with a cookie cutter. Transfer cut-outs to a parchment lined baking sheet.
  3. Beat remaining egg, 1 tablespoon chamomile tea and 1 tablespoon honey together in a small bowl. Brush mixture onto the cut-outs using a pastry brush. Bake treats for 20 minutes. Brush again with honey glaze and bake for an additional 20 minutes. Transfer to a wire rack. Allow biscuits to cool completely before treating your buddy.

Note:  Not into cookie cutters? A knife or pizza cutter may be used to cut the dough into squares before baking.


Chocolate Turtle Pumpkin Torte

$
0
0


Sometimes I'll fall in love with a song and listen to it on repeat for hours. It satisfies some longing in the soul. That's kind of how I feel right now except it's not for music, it's for pumpkin and chocolate. I keep using this combination in my fall baking with no signs of stopping! 


This torte combines yummy pumpkin cake layers and the flavors of chocolate turtle candies. It's so good and so easy (yes, easy!) I might bring it home for Thanksgiving dinner this year.

I use prepared dulce de leche for the filling in this cake and it's also in the topping. It provides all of the milk-caramel flavor you'd want without any sugar-boiling or candy thermometers. This is a great shortcut, but I must speak a few cautionary words - we all know that quality ingredients make quality food; it's a universal truth that bears repeating. Use the best prepared dulce de leche you can find.


Since salted caramel turtles are my favorite chocolate thing in all the land, I couldn't hold back a sprinkling of fleur de sel on top. That little sprinkle works its magic well on pecans, caramel and chocolate. I highly suggest you give it a try!

Chocolate Turtle Pumpkin Torte
[click for printable recipe]
Yield: One 8-inch double layer cake
Source: Sprinkle Bakes and Hershey's chocolate frosting recipe
Prep: 1 hour, total time about 2.5 hours

Pumpkin cake layers
2 cups/250g  all purpose flour
1 teaspoon baking powder
1 teaspoon baking soda
2 teaspoons pumpkin pie spice
1/2 teaspoon salt
1 cup/200g granulated sugar
1/2 cup/ 115g dark brown sugar, packed
1/4 cup/ 50g vegetable oil
4 large eggs
15 oz. pumpkin puree
1 teaspoon vanilla

Frosting/topping
1/2 cup/113g unsalted butter
2/3 cup/53g unsweetened cocoa powder
3 cups/330g confectioners' sugar
1/3 cup/80g whole milk
1 teaspoon vanilla extract
28 oz. prepared dulce de leche
2-4 tablespoons heavy cream
1/2 lb. pecan halves
Chocolate shavings
Fleur de sel, if desired
  1. Preheat oven to 350F.
  2. Grease and flour two 8-inch round cake pans, or spray with flour based baking spray.
  3. Combine flour, baking powder, baking soda, pie spice and salt in a large bowl. Whisk together; set aside.
  4. Combine sugar, brown sugar and vegetable oil in a separate large bowl. Mix well with an electric hand mixer until well combined. Add eggs one at a time, mix well after each addition. Add pumpkin puree and vanilla, mix until smooth. Gradually add flour mixture to pumpkin mixture while mixing on low speed. Divide batter equally between the two prepared pans. Bake for 30 minutes or until cakes spring back when pressed in the center. Let cake cool 5 minutes in the pan and then turn out on to cooling racks. Allow cakes to cool completely.
  5. For the frosting, melt the butter in a microwave at 30 second intervals or on the stove-top in a small saucepan over low heat. Combine the butter and cocoa in a large bowl. Mix with a spoon until smooth and well combined. Add powdered sugar and milk alternately while beating with an electric mixer on medium-high speed.  Beat in vanilla extract. 
  6. Torte each cake layer so that there are four even layers. Use about 18 oz. of the dulce de leche to cover three cake layers. Stack the layers so that the unfrosted layer is on top. Frost the entire cake with the chocolate frosting. Place a line of pecan halves all the way around the bottom edge of the cake (be sure to do this before the frosting sets or they won't stick!). 
  7. Place the remaining dulce de leche in a microwave safe bowl. Add 2 tablespoons heavy cream. Heat for 30 seconds in the microwave; stir well. Mixture should be loosened enough so that it falls from your spoon in a ribbon. If mixture is not to consistency, add another tablespoon of heavy cream and heat for another 30 seconds; stir. Add additional cream and heat as needed until the mixture comes to consistency.
  8. Pour mixture over top of the cake and spread gently with the back of a spoon so that the caramel drips down the sides of the cake. Top with remaining pecans chocolate shavings. Sprinkle fleur de sel over the top of the cake, if desired.


Butter Toffee Candy Bar Shots in Edible Chocolate Shot Glasses

$
0
0

I can hardly believe we're sailing into November this week! As we cruise into these major holiday months, my attention is turned toward entertaining. I love to offer gussied up individual desserts at a meal's end. That's what these entirely edible shots are all about!

To make these you'll need a silicone shot glass mold. I found mine online (here). The mold is small and relatively inexpensive (they range from $3 to $15) so I didn't mind allotting it a little of my rationed cabinet space. I'm already planning to use it again for Christmas. Wouldn't a tray of these in gingerbread and peppermint flavors be so party-perfect? Yes!


Eating one of these is like eating a toffee candy bar, except with a flowing toffee center.  I decided to use store-bought tea biscuits as "coasters" and in the end I really appreciated having that cookie as a foil for all that sweet toffee. The rims of these are dipped in English toffee bits, which gives them a little extra crunch and yumminess.


I used about 3/4 lb. of milk chocolate for six shots. I didn't temper the chocolate, I just melted it slowly over a bain marie until it was smooth and then poured it into the cavities using a spoon. I suggest using block chocolate, but if using chocolate chips, check the label to make sure there's at least some amount cocoa butter in the ingredients. The good stuff (with cocoa butter) will mold better and you won't have as many gaps or air bubbles in your glasses. They'll taste better, too!


The added sword cocktail picks look pretty cute and contribute to the idea of these being "shots" - though there's not a drop of booze in there! But if you must, a jigger of rum in the toffee would make a delicious butter rum version. Now, that's an idea!

Butter Toffee Candy Bar Shots
[click for printable version]
Source: Sprinkle Bakes original recipe
Yield: 6 servings
Prep: 30 minutes, total time about 1 hour

You'll need a 6 cavity silicone shot glass mold for this recipe. They can be found online or at specialty cooking shops. The Rich Tea Biscuits I used as "coasters" are a product of the UK. US readers can find them in the international aisle at the grocery store. I've also purchased them at CostPlus World Market.

3/4 lb. milk chocolate
2/3 cup/ 138g dark brown sugar
1/2 cup/ 113g unsalted butter, cubed
7 oz. (1/2 of a 14 oz. can) sweetened condensed milk (not evaporated milk)
1 teaspoon vanilla
pinch of salt
4 oz. English toffee bits
Whipped cream
Chocolate shavings, if desired
6 Rich Tea Biscuits or any 3-inch round butter cookie
  1. Fill a saucepan 1/3 full of water and bring to a simmer. Chop chocolate into small even pieces and place in a metal heat-proof bowl. The bowl should be big enough to sit on top of the saucepan without it touching the water. Place the bowl over the simmering water and stir constantly with a rubber spatula until chocolate is completely melted. Place a 6 cavity silicone shot glass mold on a small baking tray. Fill the cavities halfway with the melted chocolate, then tap the baking sheet on the work surface to remove air bubbles. Fill the cavities the rest of the way and tap again until no air bubbles appear at the surface. Place in the freezer until completely solid, about 1 hour.
  2. Meanwhile, combine brown sugar, butter and sweetened condensed milk in a medium saucepan.  Place over medium-low heat and stir until butter is melted and sugar has dissolved. The mixture should not thicken much and should fall in a ribbon from your spoon. Stir in vanilla and the pinch of salt. Transfer toffee to a clean bowl to cool. Toffee is ready to use when barely warm and still pourable. 
  3. Unmold shot glasses by pressing them up from the bottom turning the mold inside-out. Twist the chocolate shot glass slightly and pull to release. Pour toffee bits into a shallow dish. Dip the rims of the shot glasses into the toffee filling and then into the toffee bits. Spoon toffee filling into the shot glasses (you should have a little filling left to drizzle on top later). Top the shots with whipped cream and a drizzle over some of the leftover toffee filling. Garnish with chocolate shavings, if desired. Refrigerate leftovers.

Fairy Bread Party Cake and a Hey YoYo Giveaway

$
0
0

Today I'm bringing you a special Hey YoYo giveaway! We're in the midst of holiday baking season, so it's a good time to stock up on baking essentialspartyware and pretty packaging. Wouldn't a $40 Hey YoYo gift certificate be nice to help out with that? Yes!

In addition, all Sprinkle Bakes readers shopping at Hey YoYo will receive a 20% discount by entering promo code sprinklebakes at checkout - something for everyone! I like it.


Before I get to the fairy bread party cake (which may be my favorite sprinkle cake, ever!) I have to tell you about these neat edible icing transfers. They meld right onto buttercream icing and make cupcakes look adorable. It's seriously the easiest cupcake decorating I've ever done! And I love how they match the rest of the Toot Sweet party line.


With all the confetti-themed party supplies floating around the house, I couldn't resist making a fun celebration cake. This one stems from my love of fairy bread. It's easily made with an 8x8 square cake pan and a serrated knife. I used some brown fondant strips around the edges to give it an authentic-looking bread "crust", but honestly, the cake was pretty cute without the fondant!

Dotty party candles are a must-have!
Dancing ballerinas and sprinkled cupcakes are party-perfect!


Hey YoYo ships everywhere, so this contest is open worldwide!
a Rafflecopter giveaway


This is a nice little all-purpose single-layer white cake. The recipe description is "white velvet" but the southern girl in me hesitates to call it such. In my experience, a true velvet cake should be made with buttermilk and have vinegar and baking soda leaven. I'm often surprised at what people will call a velvet cake, but I'm never one to turn down a piece - however it's been remixed!

Fairy Bread Celebration Cake
[click for printable recipe]
Yield: 8-10 servings
Source: adapted from Roses' Heavenly Cakes; Sprinkle Bakes frosting and design
Prep: 20 minutes; total time about 1 hour

Cake
2 cups/ 200g cake flour
1 cup/ 200g granulated sugar
2 1/2 plus 1/8 teaspoons baking powder
1/2 teaspoon salt
8 tablespoons/ 113g unsalted butter, softened
2/3 cup/5.6 oz/ 160g whole milk
3 large egg whites
1 1/2 teaspoons vanilla extract

Frosting/ toppings
1 cup/226g unsalted butter, softened
2 cups/230g confectioners' sugar
1-2 tablespoons milk
2/3 cup rainbow sprinkles (jimmies)
2 tablespoons rainbow nonpareils
5 oz. milk chocolate fondant

  1. Preheat the oven to 350F/175C. 
  2. Grease and flour an 8x8 baking pan, or spray it with a flour based baking spray (recommended).
  3. Mix flour, sugar, baking powder and salt in a large bowl. Add butter and milk; mix on low speed with an electric hand mixer. Add vanilla and raise speed to medium, beat for 2 minutes.
  4. Reduce speed to medium low and gradually add the egg whites in two additions. Beat at medium speed for 2 minutes. Scrape batter into the prepared pan and smooth the surface with a rubber spatula.
  5. Bake the cake for 35-45 minutes, or until the top is golden brown and a toothpick tester comes out clean. Let cake cool in the pan before turning it out onto a wire rack to cool completely. When cake is cool, place on a cake board or serving platter. Designate the top of the cake and round those two corners using a serrated knife. Carve away cake pieces a little at a time until a bread slice shape is achieved (see pictures).
  6. For  the frosting, combine the butter and confectioners' sugar in a large bowl. Beat on medium speed until combined. If frosting is stiff, add milk 1 tablespoon at a time until a spreadable consistency is achieved. Beat at high speed for 2 minutes until fluffy. Spread frosting onto the surface of the cooled cake; leave a 1-inch unfrosted border around the top edge of the cake. Pour sprinkles and nonpareils onto the frosting. Use a pastry brush to sweep away any stray sprinkles or crumbs from around the cake. 
  7. Knead the fondant until pliable. Roughly shape it into a rope between your palms, then roll it out flat with a rolling pin. Cut one 16-inch long x 1 1/2-inch wide strip. Re-roll scraps and cut another strip of the same size. Frost the sides of the cake with some of the remaining frosting (you will have leftover frosting) Apply fondant strips to the sides of the cake. Trim away excess with a small plain-edge knife. Store cake loosely covered in plastic wrap.

Sweet Potato Pecan Praline Cheesecake Bars

$
0
0

Cheesecake is a dessert that everyone in my family loves. I turn to it for our annual gatherings more than any other sweet, and it never disappoints. This sweet potato version is a new favorite of mine. It's light and mild with a creamy texture rather than being tangy and dense (I'm looking at you New York cheesecake!).

I whipped up an easy pecan praline sauce to give it added texture and sweetness. In my opinion, the sauce really makes this dessert. The buttery brown sugar flavor contrasts perfectly with the mild sweetness of sweet potato.


Believe it or not, this recipe's humble genesis was from an old weight loss magazine. I was drawn in by the beautiful pictures, but I cringed reading the ingredients - low-fat/no-fat and Sucralose-laden... yeesh! I threw out the recipe but kept the picture for inspiration. In the end, a delicious dessert was realized: gingersnap crust (the original recipe didn't even have a crust - seriously?), a sugar-sweetened yammy cream cheese filling, and a brown sugar-pecan topping that underscores all the above.

I have a feeling this recipe will be in heavy rotation for the next couple of weeks. These bars are SO easy to make and quintessentially fall!

Sweet Potato Pecan Praline Cheesecake Bars
[click for printable version]

Yield: 15-20 bars; one 10x10 or 13x9 pan
Source: Sprinkle Bakes original
Prep 25 minutes, 6 hours 25 minutes with chilling

Crust
2 cups/272g gingersnap cookie crumbs
1/2 cup/ 57g unsalted butter, melted

Filling
3 packages/24 oz. cream cheese, softened
3/4/150g cup granulated sugar
15 oz. sweet potato puree (canned, packed sweet potato is fine)
2 tablespoons/16g all-purpose flour
1 tablespoon ground cinnamon
1 teaspoon vanilla extract
2 large eggs

Topping
1/2 cup/64g unsalted butter
1/2 cup/110g brown sugar
2 tablespoons milk or cream
1/4 cup chopped pecans
Pinch of sea salt
  1. Preheat oven to 325F.
  2. Combine the cookie crumbs and melted butter in a small bowl. Stir until crumbs are evenly moist and covered in butter. Press into the bottom of a lightly buttered 10x10 or 13x9-inch baking dish. Refrigerate while you prepare the filling.
  3. For the filling, combine the cream cheese and sugar in a medium bowl. Beat well on medium speed with an electric hand mixer. Add the pumpkin, flour and cinnamon; mix well. Add vanilla and eggs and beat on low speed until just combined.  Pour filling over chilled crust.
  4. Bake for 40-45 minutes. When done, the center of the cheesecake will be almost set but still have a slight wobble. Let cheesecake cool in the pan, then cover and transfer to the refrigerator. Chill for 6 hours or overnight (preferred). Cut cheesecake into bars, approximately 15-20 pieces.
  5. For the topping, melt the butter over medium heat in a small saucepan. Add the brown sugar and stir to combine. When sugar is almost completely melted whisk in the milk; stir until smooth. Stir in pecans and sea salt. Let cool slightly before pouring over bars. Serve. Store leftovers loosely covered in the refrigerator.


24 Karat: Saffron Poached Pears with Chocolate

$
0
0

'Tis the season for poaching pears, my friends. It's cold here, and I've been spending my time stirring pots of simmering spices and sitting on the kitchen floor (book in hand) in front of my oven. It's my particular way of keeping warm, both physically and in spirit.

Something else that warms my soul - unexpected goodies sent from a friend traveling abroad. I squealed a little when I unwrapped the little matchbox of red-orange threads: saffron. It's one of the more magical items you can use in cooking, if you ask me. I mean, how can just a pinch yield such magnificent golden color? Magic.


Saffron is complex on the tongue, and it's possible that each taster will have a different flavor experience. These pears are simmered with a vanilla bean, and to me, they seem to take on sweet honey-like qualities. Although the pears are indulgent on their own, the chocolate sauce makes the dish decadent. Pour over as little or as much as you like!


These are so easy to make, but you'll need to plan ahead. I poached the pears and then let them stand in the poaching liquid overnight to absorb as much color and flavor as possible. This isn't absolutely necessary, but I found the vanilla flavor was more pronounced. The color was just a tad brighter, too.

Saffron Poached Pears with Chocolate
[click for printable version]
Yield: 4 servings
Source: adapted from Chef Jun Tanaka's recipe
Prep: 20 minutes; total time 40 minutes to overnight (subject to your variation)

This is my riff on poires au chocolat. A word about choosing pears for this recipe - try to find pears with an almost apple-like firmness, especially if you plan to steep the pears overnight. I use and recommend Bosc.

Saffron pears
3 3/4 cups /875 ml cold water
1/2 lemon
1 cup/200 g granulated sugar
4 firm pears, peeled with core and stems in tact
1 pinch saffron threads
1 vanilla bean pod

Chocolate sauce
1/2 cup/82g chopped semisweet chocolate
3 tablespoons heavy cream
1 tablespoon unsalted butter
Edible gold leaf  *optional
  1. For the saffron pears, fill a medium saucepan with the cold water. Squeeze the lemon over the water and then add the rind to the pot. Add the sugar and stir briefly. Carefully place the peeled pears in the water. Place over medium-high heat and stir until the sugar is melted. Split the vanilla pod and scrape out the seeds. Add the seeds and pod to the saucepan. Add the pinch of saffron. Bring ingredients to full boil and then reduce to a simmer. Simmer for 20 minutes or until just fork-tender. Remove from heat and let the pan cool to just warm. You may drain and serve the pears immediately, or cover the saucepan and place in the refrigerator overnight for intensified color and flavor. If you choose the overnight method, gently re-heat pears in the poaching liquid before serving.
  2. For the chocolate sauce, place all ingredients in a small saucepan and cook over medium-low heat. Stir until all components are melted and blended smooth. Place pears on a serving plate and top each pear with chocolate. Adorn with gold leaf if desired.
Baker's note: Whenever I feature poached pears on the blog, someone inevitably asks how they're supposed to eat them. Although I'm a bit puzzled by this, I'll formally state here that serving them with a knife and a fork is a good idea. (smile)

Five Minute Bourbon Balls

$
0
0


This year my Christmas candy wishlist is bigger than ever!  It's making a real mess of things in my kitchen, but in the end those dirty dishes are usually worth it.  Of course, if I had my preference every candy recipe would be just like this one - easy, delicious, and my kitchen didn't suffer any turmoil.  And it's a seasonal favorite to boot!


I mixed these up in five minutes flat, and in about five more I had them all rolled out and stored in a tin. You can eat them immediately, but they improve upon standing. In about three days' time the boozy edge will mellow and the bourbon flavor will be more developed. I plan to make several batches ahead of time to give as Christmas gifts.


Since these only have five ingredients, I'd urge you to use best of each. I used quality chocolate, local honey and a fine Kentucky bourbon. Keep these guys tightly closed in a tin for longevity and they'll keep for up to four weeks!

Five Minute Bourbon Balls
[click for printable version]
Yield: 1 1/2 dozen
Source: adapted from a vintage Betty Crocker microwave cookbook
Prep: 5 minutes, total time about 10 minutes

1/2 cup/ 4 oz. semisweet chocolate chips
2 tablespoons/ 43 g honey
1 1/2 cups finely ground vanilla wafers (such as Nilla Wafers)
1 1/2 cups/ 155g ground walnuts
3 tablespoons/ 45 ml bourbon whiskey (I used Wild Turkey Kentucky Bourbon)

Pour 1/2 cup of the ground walnuts in a small bowl and set aside for later use.
Mix chocolate chips and honey in a 1 1/2 quart microwaveable bowl. Heat in the microwave at full power 1-2 minutes, until the mixture can be stirred smooth with no lumps remaining.
Stir in ground vanilla wafers, walnuts and whiskey. Stir; mixture should be quite thick. Scoop out mixture by the level tablespoons and roll into balls. Roll in reserved 1/2 cup of ground walnuts. Store tightly in a covered container. Flavor will fully develop over four days. Stored properly, these will keep up to 4 weeks.

Note: If you don't have a microwave, you can melt the chocolate and honey over medium-low heat in a saucepan. This may take a little longer (you'll have to abandon the 5 minute moniker) but it'll be worth the time and effort!

Candy Cane Mice

$
0
0

How funny are these little guys? I couldn't help but giggle as I made them because each seemed to take on a different personality. They're simply made from meringue and candy canes. I used jumbo confetti sequins (like these) for their ears, but slivered almonds would work well, too. I love how they're like a lollipop with an edible stick.

Even though these are pretty easy to make, Biscuit and I decided to make a short video tutorial!

(email subscribers click here or here to view)


You can make these using stiff peak royal icing also, (which eliminates baking) but the baked meringue version is my favorite, and that's what I chose to demonstrate in the video.


I learned a few things after making several batches of these. There are some small details that need attention for a perfect end result.

  • Make sure to buy candy canes that are made of hard candy. They'll be shiny and heavy, unlike porous lightweight candy canes that are softer and made for chewing. You want the ones with the hardness of a lollipop. One brand I used was Jelly Belly for blueberry, bubblegum and green apple flavors - fun! 
  • If making the baked meringue version, bring the eggs to room temperature before whipping. They'll gain maximum volume and stand up to the oven's heat better.
  • Add the sugar to the egg whites gradually. I'm talking 1/2 tablespoon at a time. Incorporating the sugar slowly will help avoid a grainy meringue.
  • Beat the meringue until stiff peaks form. This can take up to 7 minutes. Don't skimp on this part, otherwise the mice will weep and flatten in the oven. The extra moisture will cause some of the candy cane to melt and run.
  • Make sure your oven temp is true. These are baked at a mere 160 degrees F. and if your oven is too hot the candy canes will melt and make fat squirrel tails instead of thin little mousy tails. But then, squirrel tails are pretty cute too... hmm.


These also make way cute Christmas tree decorations - just be sure to make the royal icing version instead of the meringue version for the tree. Meringue will soften with humidity in the air, and royal icing is much more durable (as most gingerbread-builders know). 

Candy Cane Mice
[click for printable version]
Yield: 16 mice
Source: SprinkleBakes original recipe
Prep: 1 hour, total time with drying up to 24 hours


2 egg whites, at room temperature
1/4 teaspoon (1g)  cream of tartar
1/2 cup (100g) granulated sugar
16 full size candy canes (hard candy type, see tips)
Jumbo confetti sprinkles or almond slivers
Black Sixlets pearls or jumbo nonpareils
Black nonpareils
  1. Prepare two large baking sheets by lining them with parchment paper. Preheat the oven to 160 degrees F. Unwrap candy canes and line them up (6-8 canes per sheet) on one side of the baking sheet, spaced 2-inches apart.  The candy canes’ curved end should be pointed toward the edge of the baking sheet leaving plenty of space to pipe meringue onto the pointed end.
  2. Place room temperature egg whites in the bowl of an electric mixer fitted with a whisk attachment. It is important that the bowl and whisk both be very clean, so that the egg whites whip properly. Begin beating the egg whites on medium speed. Once they are very frothy, stop the mixer and add the cream of tartar. Start the mixer again and continue to beat the egg whites. Once they form soft peaks, increase the speed to high and gradually add the sugar, 1/2 tablespoon at a time. Beat the whites until they are very shiny and hold stiff peaks, but are not dry or crumbly.
  3. Spoon the meringue into a large pastry bag fitted with a 1/2-inch round tip (You may also use a zip-top bag with the corner snipped). Pipe meringue onto the end of a candy cane in a large teardrop shape; decrease pressure as you pipe and pull the bag away to create a point that will be the mouse’s nose.  If meringue point falls downward, wipe the fallen part away with a finger. Press a black nonpareil onto the end of the point.  Place two black Sixlets pearls on either side for the eyes.  Press a jumbo confetti sequin onto each side of the head for the ears.
  4. Bake the meringues at 160 degrees F. for about 90 minutes, turning them halfway through the cooking time to ensure an even bake.  Let mice cool on the baking sheet. The candy canes will be soft and break if moved too soon. When cool, the meringues should be hard and dry to the touch, and you should be able to easily lift them easily from the parchment. 
If making the royal icing version, click here for my Royal Icing with Meringue Powder recipe. Proceed as directed for baked meringue mice, but do not bake. Allow royal icing to set 24 hours before lifting from the parchment. Since this version is not baked, you may use chocolate chips for eyes instead of Sixlets pearls or jumbo nonpareils.

TIPS!
  • Make sure to buy candy canes that are made of hard candy. They'll be shiny and heavy, unlike porous lightweight candy canes that are softer to chew. You want the ones with the hardness of a lollipop. One brand I used was Jelly Belly for blueberry, bubblegum and green apple flavors - fun! 
  • If making the baked meringue version, bring the eggs to room temperature before whipping. They'll gain maximum volume and stand up to the oven's heat better.
  • Add the sugar to the egg whites gradually. I'm talking 1/2 tablespoon at a time. Incorporating the sugar slowly will help avoid a grainy meringue.
  • Beat the meringue until stiff peaks form. This can take up to 7 minutes. Don't skimp on this part, otherwise the mice will weep and flatten in the oven. The extra moisture will cause some of the candy cane to melt and run.
  • Make sure your oven temp is true. These are baked at a mere 160 degrees F. and if your oven is too hot the candy canes will melt and make fat squirrel tails instead of thin little mousy tails. But then, squirrel tails are pretty cute too... hmm.

Sugar Plum Fruitcake with Cream Cheese Frosting

$
0
0

Many of you know that I've spent 2013 baking for Betty. It's been a lively year of fun minion cakes, candy bar creations and snickerdoodle skillets. I'd anticipated some special holiday projects, and I was thrilled to learn I'd be recreating one of their Red Hot Holiday Trends! You see, each year the sweet minds behind Betty Crocker gauge what's new and exciting in the baking world - turns out, fruitcake is so in!

But not just any old fruitcake (so leave those bright green and red candied cherries on the shelf!). We're talking bourbon-plumped figs, juicy dates, plum jam filling and homemade cream cheese frosting. Frosting on fruitcake? Heck yes. Cheese paired with fruit is almost always a heavenly match.


This recipe uses Betty Crocker's SuperMoist®  yellow cake mix as a base, and considering how lengthy most fruitcake recipes are, it's a nice little shortcut to scratch-made flavor. I baked the batter in my three favorite 7-inch spring-form pans, but it'll bake up perfectly as a 9-inch double layer cake, too.  


Red plum jam is used as the filling, and it plays well against the fruit and fragrant orange zest used in the cake batter. There's a definite sweet-tart boozy goodness to this confection, and the creamy frosting helps to strike just the right balance.


Since some folks have a knee-jerk reaction to the word "fruitcake", I'll understand if you want to drop that moniker and just call this "Sugar Plum Cake. It's really nothing like the traditional (read: brick) fruitcake you'll see on Great Aunt Earnestine's buffet. It's moist and flavorful, and to me, it tastes just like Christmas.

Be sure to check out Betty's take on the new fruitcake, and a slideshow of all the yummy trends by other Betty bloggers!

Sugar Plum Fruitcake
[click for printable version]
Yield: 12 servings
Source: Sprinkle Bakes original recipe
Prep: 30 minutes, total time with fruit-soaking up to 24 hours

Cake
1 box Betty Crocker SuperMoist® yellow cake mix
1/2 cup dried dates, chopped
1/2 cup dried figs, chopped
1/4 cup Kentucky bourbon
Zest of 1 orange
4 eggs
1/3 cup vegetable oil
1 cup water
1/2 cup slivered almonds, crushed

Filling
3/4 cup prepared red plum jam or jelly

Frosting
8 oz. cream cheese, softened
1/2 cup unsalted butter, softened
2 cups powdered sugar
1 fresh, whole red plum
Corn syrup
2 tablespoons granulated sugar
  1. Combine the dates and figs in a small bowl. Pour over the bourbon and cover tightly. Allow fruit to soak for at least 2 hours or overnight (preferred).
  2. Heat oven to 350F. Grease and flour three 7-inch cake pans (or two 9-inch); set aside.
  3. Combine the following in a large bowl: cake mix, orange zest, eggs, vegetable oil and water. Mix well with an electric hand mixer. Fold in bourbon-soaked fruit and crushed almonds. Pour cake batter into prepared pans and bake for 30-35 minutes, or until the cakes spring back when pressed in the center. Turn cakes out onto a wire rack to cool completely.
  4. When cakes are cool, fill the layers with red plum jam. 
  5. For the frosting, combine the cream cheese and butter in a large bowl. Beat well with a hand mixer until combined and creamy. Add powdered sugar a little at a time; beat on high speed until smooth and fluffy. Cover the cake in a thick coating of cream cheese frosting.  
  6. For a wintry decoration, brush the fresh plum with a little corn syrup and roll in the granulated sugar. Place slightly off-center on top of the cake.  
  7. Serve immediately. Store cake loosely covered in the refrigerator. Bring cake to room temperature before serving.

This post is sponsored by Betty Crocker, and is part of the Red Hot Holiday Trends of 2013.

Three Designer-Worthy Gingerbread Houses for HGTV!

$
0
0

Gingerbread houses are a favorite of mine to make during the Christmas season. You might already know this if you're a regular reader (if not, see here, here and even here!). This past summer HGTV cooked up an idea for three different takes on gingerbread structures, and they asked if I'd be willing to whip them up for a holiday feature. I was more than happy to oblige!


The first on my list to design was a log cabin. The walls are made of gingerbread, but then they're covered with pretzel rods cut to size. It's hard to pick a favorite of the three houses, but this one may be it (it's the coziest, if you ask me!). If you'd like to try your hand at making it, click here for the template, here for the recipe and here for a step-by-step image gallery.


Next is the Cape Cod home. It uses the same template as the Log Cabin, but the structure is turned differently (using the long side as the front). My husband and I live in a Cape Cod house, so this one had special significance for me. Despite lacking dormers (for simplicity's sake), I think it represents the style fairly well.

Want to give it a try? You can find the recipe here and the step-by-step image gallery here.


Last but not least is the Victorian. The original idea was to use one template for all three houses, but I felt the Victorian needed more character. So, this house uses a different set of plans (you can find them here). It seemed daunting to design turrets and bay windows, so I kept things fairly simple.

If you'd like to try your hand at recreating it, you can find the recipe here and the step-by-step images here. The pine tree cupcake picks I used to decorate around all of the houses can be found here.

I hope you've enjoyed seeing my cookie architecture, and I hope it inspires you to make your own!
Happy building!
xo
-h

Black Forest Dome Cake

$
0
0

Black forest cake has been on my baking bucket list for ages. I've attempted it several times - and made it as far as the deep chocolaty cake layers - only to find that my jar of cherries had gone missing (i.e., eaten by a forgetful me). This time I bought two extra jars and resolved to just make it already! 

My previous attempts always gravitated toward the standard 9-inch round double layer cake covered in whip and chocolate shavings et al. But not this time. I'll claim the muse led elsewhere, but it could just be my inability to ever make something exactly as it is intended to be made. Either way, what resulted is a rather stately black forest-zuccotoesque (that's not really a word)-dome cake. It's mighty good, too!


For the cake layers and dome, you'll make the same chocolate cake recipe twice. An entire batch of batter gets baked in a bowl (2 quart or larger) and the second batch gets baked into two 9-inch rounds. The rounds get a heaping helping of chopped morello cherries. In most black forest cakes the cherries are left whole, but I chopped them because I wanted this cake to slice beautifully, and I'm happy to report, it does!

The filling is also a bit of departure from tradition. Whipped cream is the usual filling and cake covering, but I used boiled frosting that, to me, resembles a gourmet version of Hostess Twinkie Filling (no kidding!). It is absolutely cloud-like and it holds up better if left standing on a buffet for several hours (as cakes tend to do during our family Christmas gatherings).


I forgot to mention the Kirsch syrup! All the cake layers get a good drenching of Kirschwasser syrup that's mixed with morello cherry juice. As you can imagine, this makes every bite moist and SO flavorful.


My inspiration for the little chocolate decors comes from the hand-carving on black forest cuckoo clocks. Oak leaves and pine cones are a common motif, and I decided they should be included somewhere on this cake. Ghiradelli recently sent me a few packages of their dark chocolate melting wafers, so I used them in the molds instead of taking pains to temper chocolate. They turned out pretty cute, and they taste good, too!


This cake takes a bit of time to make, and even though I made it in one day, I can't recommend doing that. It'd be much easier and less stressful to make the cake layers one day, and the fillings/frostings the next. This cake is certainly time consuming, but it's very much worth the time and effort. It may just be my favorite cake to date!

Black Forest Dome Cake
[click for printable recipe]
Yield: 24 servings
Source: Sprinkle Bakes original with cake adapted from Ina Garten.
Prep: 4 hours; total time about 8 hours or up to 24

Stock up on semisweet chocolate before making this recipe. The chocolate frosting uses 1 1/2 lbs., which is more than I've ever used in a single frosting recipe, but the end result is a true chocoholic's dream! I suggest making this cake over the course of  two or three days. Chilling the dome cake before filling it is essential, otherwise it will be too soft and break apart under the weight of the whipped filling- so don't skip that step! Please read the notes at the bottom of this recipe for additional tips.

Cake
1 cup/ 242g  buttermilk
1/2 cup/ 100g vegetable oil
2 large eggs, room temperature
1 teaspoon vanilla extract
1 3/4 cups/221g  all-purpose flour
2 cups/400g granulated sugar
3/4 cups/ 68g cocoa powder
2 teaspoons baking soda
1 teaspoon baking powder
1 teaspoon salt
1 cup/230g  freshly brewed hot coffee
For the two 9-inch rounds:
  1. Preheat oven to 350 degrees F. Grease two 9-inch round cake pans and line them with parchment (or use flour a flour-based baking spray to grease and flour in one step-no parchment needed).
  2. In a four cup measure, combine buttermilk, oil, eggs, and vanilla set aside. Combine the flour, sugar, cocoa, baking soda, baking powder and salt in a large bowl. Whisk together until flour and cocoa are free of lumps. With the mixer on low speed, slowly add the wet ingredients to the dry. Gradually add the hot coffee and mix briefly; scrape down bowl and beat again on low speed. Pour batter into the prepared pans and bake for 35-45 minutes. Turn them out on a wire rack to let cool completely. Level cakes with a large serrated knife if needed. Wrap layers in plastic wrap and refrigerate to firm, about 2 hours.
For the dome cake
Grease and flour a 2 quart (or larger) heat-proof bowl (preferably stainless steel). Repeat cake batter recipe and mix batter as directed. Pour batter in prepared bowl and bake for 50-60 minutes or until cake springs back when pressed in the center. Turn cake out onto a wire rack and let cool completely. Wrap in plastic wrap and place in the freezer to firm, about 2-3 hours.

Boiled whipped vanilla filling
1/4 cup/32g flour
1 teaspoon salt
2 cups/460g whole milk
2 cups/1 lb unsalted butter, softened
2 cups/400g granulated sugar
1 tablespoon vanilla bean paste or vanilla extract
  1. In a medium saucepan, whisk together flour and 1/2 cup of milk until smooth. Set over medium heat and let cook for 3 minutes, or until slightly hot. Whisk in remaining milk and salt. Whisk constantly until the mixture is thick and paste-like (almost like pudding). Remove from heat and pour into a separate bowl. Place in the refrigerator until cool. When cool, mixture will be thick like set custard.
  2. In a large bowl (or bowl of a stand mixer, if you have one) beat the butter and sugar together until fluffy. Add vanilla and mix well. Beat in cooled flour mixture one tablespoon at a time on medium-high speed. When all the flour mixture is added, beat on high speed until light and fluffy, about 6 minutes. Rub a little frosting between your fingers, if sugar granules remain, beat for 4 more minutes, or until granules cannot be detected with fingers. Set aside (do not refrigerate) and prepare cherries and syrup.
Cherry filling and syrup
24 oz. jar morello cherries in light syrup
3 tablespoons kirschwasser liqueur
1/4 cup/50g granulated sugar
6 oz. black cherry jam or jelly
  1. Drain cherries and reserve 3/4 cup of cherry juice. Chop cherries (I used a food processor) and press through a sieve to remove additional juice created during chopping. Stir cherries together with black cherry jam or jelly. Set aside.
  2. Combine 3/4 cup cherry juice and 1/4 cup sugar in a small saucepan. Set over low heat and stir until sugar is dissolved. Remove and stir in kirsch liqueur.
Dark chocolate frosting
1/2 cup/46g unsweet cocoa powder
1/2 cup/115g freshly brewed hot coffee
1/4 cup/50g granulated sugar
2 cups/1 lb. unsalted butter, softened
3 1/2 cups/ 1 1/2 lbs. semisweet chocolate, melted and cooled
  1. Combine cocoa and hot coffee in a small bowl; whisk until smooth and set aside to cool. Beat sugar and butter together in a large bowl using an electric mixer (or stand mixer with whip attachment, preferred). Gradually beat in cooled chocolate; scrape down bowl and beat again. With the mixer on medium-low speed, gradually add cocoa/coffee mixture. Beat until smooth. If frosting is too lax to frost cake, place in the refrigerator for 10 minutes, or until just firm enough to spread.
Cake assembly
Chocolate oak leaves and pine cones (as explained in blog post)
Powdered sugar for dusting
  1. Remove cake layers from refrigerator and place a 9-inch round on serveware. Brush liberally with kirsch syrup. Cover with half the chopped cherries. Spread about 3/4 cup of boiled vanilla filling over the cherries. Top with second 9-inch cake layer; brush liberally with kirsch syrup, cover with remaining cherries and spread about 3/4 boiled filling over the cherries. Remove bowl cake from the freezer and place it flat-side-up on a plate (or place it back in the bowl it was baked in). Remove the center of the cake using a serrated knife and reserve -note: try to remove it in one piece with flat portion in tact. Place 3/4 of the remaining frosting into the center. Use a serrated knife to cut off the flat end of the reserved cake piece, this creates a cover for the filled center. Place it onto the frosting-filled center and refrigerate for 30 minutes. Turn chilled dome cake over onto the stacked and filled 9-inch rounds. Brush dome layer liberally with kirsch syrup. Use additional boiled frosting to fill in any gaps around the stacked cakes. Generously frost the entire cake with the dark chocolate frosting (there's a lot of frosting, but keep piling it on - it helps give the cake its round shape!). Place chocolate pieces around the bottom edge of the cake. Dust entire cake with powdered sugar. Refrigerate 30 minutes, or until chocolate frosting is set. Bring cake to room temperature before serving. Store cake loosely covered in refrigerator.
Notes about this cake
  • Some people have experienced trouble with the boiled filling in a previous recipe I developed. It's usually because the flour and milk mixture wasn't cooked long enough on the stove-top. Make sure to cook it until it is thick like pudding, and cool it completely until it has the consistency of set custard.
  • The boiled frosting may be replaced with 3 cups heavy whipping cream beaten with 3/4 cup of granulated sugar. It won't hold up as well if left sitting out on a buffet for hours, so you'll have to store the cake in the refrigerator at all times, 
  • This is a rather large cake - the equivalent of two double layer cakes! I serves up to 24 people, so don't guffaw at the amount of butter, sugar and chocolate - remember, one person is not eating the whole cake, just one (maybe two?) slices. Calorie counters - look away.
  • It's okay to use semisweet chips in the dark chocolate frosting - I did. Just make sure it's a brand that contains some amount of cocoa butter in the ingredients. Of course, high quality chocolate is preferred.
  • Morello cherries in light syrup can be found at Trader Joe's. If you don't have one in your town, grocery stores usually stock "dark pitted cherries in syrup" - buy two 12 oz. cans of those - they'll work fine.

Supplies
Chocolate leaf mold
Large chocolate pine cone mold
Small chocolate pine cone mold
Ghirardelli dark chocolate melting wafers
5-Quart stainless steel mixing bowl


Sparkling Spiked Eggnog Ganache Cupcakes

$
0
0

I was so happy when my husband offered to put up our Christmas tree this year. With all the baking and book-writing going on, I simply didn't have the time or inspiration to spare. He's a pretty creative guy (in a software developer kind of way), so I was excited to see what kind of tree-decorating magic he could work.

When he called me over to see his design, I was amazed at how beautifully woodsy and natural the tree looked. As I studied the tree in greater detail, I noticed some things were missing. Then I noticed a box set aside, and therein was every sparkly ornament I'd ever bought.

"What about these?" I picked two sequined birds from the box.
"Nope." he said.
"They're woodsy!" I argued, which garnered an eye roll.
I held up a glittered pear. He shook his head.


The good news is, I didn't even feel like sulking about the lack of sparkle because the tree was undeniably beautiful - and I didn't have to lift a finger!  Anyway, I've more than made up for the lack of holiday glitz with these sparkly,spiked eggnog cupcakes.


The cakes have a shot of rum in the batter, and if you have concerns about serving them to children, feel free to omit it. But like most boozy cakes, the alcohol bakes out only leaving behind nuances of flavor. The buttercream frosting is made from an eggnog ganache (white chocolate + eggnog = eggnog ganache!) and it gets whipped with butter and confectioners' sugar for a creamy, decadent cupcake covering. Grate a little fresh nutmeg over each mound of frosting and you've got Christmas in a cupcake!

If you're wondering about the sparkling deer, I gave these guys a makeover with silver acrylic paint. While the paint was still wet I dipped them in regular ol' glitter from the craft drawer. The pink metallic cupcake liners are available here.

Spiked Eggnog Ganache Cupcakes
[click for printable version]
Yield: 12 cupcakes
Source: cake recipe adapted from Intoxicated Cupcakes with Sprinkle Bakes original frosting
Prep: 55 minutes; total time about 3 hours

Cupcakes
4 tablespoons unsalted butter, softened
3/4 cup granulated sugar
1 large egg
2 tablespoons dark rum
3/4 cup commercially prepared eggnog
1 1/2 cups cake flour
1 1/4 teaspoons baking powder
1/4 teaspoon salt

Frosting
8 oz. quality white chocolate, chopped
1/2 cup commercially prepared eggnog
1/2 cup/ 113g unsalted butter, softened
2 cups confectioners' sugar
Freshly grated nutmeg
  1. Preheat oven to 350F. Line a cupcake pan with 12 cupcake liners. Set aside.
  2. Combine the butter and sugar in a large bowl. Mix with an electric mixer on medium-high speed and beat until creamy. Add the egg, and once beaten smooth, add the rum and eggnog.
  3. Turn off the mixer and add the flour, baking powder and salt. Mix together on low speed until well combined. Place batter in the paper liners by the level 1/4 cup. Bake for 18-22 minutes, or until a toothpick tester comes out clean. Cool cupcakes in the pan for 5 minutes, or until cool enough to handle. Transfer to a wire rack to cool completely.
  4. For the frosting, combine the chocolate and eggnog in a small saucepan. Place over medium-low heat until mixture can be stirred smooth. Transfer ganache to a bowl and let cool completely in the refrigerator, about 1-2 hours. When ganache is cool (it won't set completely like normal ganache, rather, it will be a bit soft and runny) place it in the bowl of a stand mixer and beat until slightly thickened, about 5 minutes. Add softened butter and beat briefly at high speed. Add confectioners sugar 1 cup at a time. Beat on high speed again until fluffy and mixture is lightened in color.
  5. Transfer frosting to a piping bag fitted with a large star tip. Pipe frosting onto cooled cupcakes. Grate fresh nutmeg over each cupcake; serve. Store in an air-tight cupcake caddy or covered in plastic wrap. 
Tips:
  • My cake batter was very thick. I think this was due to the brand of prepared eggnog I used. I added 2 tablespoons of milk to loosen the batter and it baked up perfectly. 
  • If the frosting is too loose to pipe and hold its shape, place it in the refrigerator for a little while to firm; re-whip with a hand mixer and then transfer to a piping bag.


St. Lucia Buns (Swedish Saffron Christmas Bread)

$
0
0

Today is St. Lucia day! The day that our Scandinavian friends celebrate Saint Lucy, a symbol of hope and light in dark times. If you're not familiar with her story, you should definitely read up about it here and watch the adorable video here. In short, The festival of St. Lucia begins the Christmas season in Swedish custom, and she comes as a young girl crowned with fresh greens and lit candles carrying a tray of baked goods. These sweet, spiral buns are traditionally served on this day.

I decided to create a traditional candle crown to surround my bowl of Lucia buns, so I spent some time yesterday in the woods collecting pine branches. I'm not at all qualified to play Lucia, but I couldn't resist trying on the crown. It's hard for me to imagine anyone walking around with lit candles on their heads! These days a safer battery operated candle alternative is offered (which I think is a good idea, considering the use of flammable hair product and whatnot).


It's difficult to be in a bad mood with the delicious aroma of yeast buns and evergreen floating around the house. Even the little sleeping dogs got feisty once I brought in those branches. You'll notice Churro-pug in some of the pictures here -I couldn't keep his sniffer out of my wreath pile!


This is one of the easiest yeast breads I've ever made. It's almost no-knead, and the dough can be refrigerated overnight, which is a nice convenience if you're considering these for breakfast. I really love the flavor and golden color the saffron lends to these airy, puffed buns. If you can't find the non-melting Swedish pearl sugar in your grocery store, it can be ordered online.


St. Lucia Buns: Swedish Saffron Christmas Bread 
[click for printable version]
Source: Adapted from The Great Scandinavian Baking Book
Yield: 24 buns

2 packages active dry yeast
1/2 cup warm water, 110F to 115F
1/2 cup sugar
1/2 cup unsalted butter, melted
1/2 cup heavy cream
1/2 cup whole milk
1/4 teaspoon crushed saffron threads
1/2 teaspoon salt
2 eggs, room temperature
4 to 4 1/2 cups all-purpose flour

Glaze
1 egg
2 tablespoons milk
Swedish pearl sugar
  1. In the bowl of a stand mixer, combine the yeast in the warm water; stir gently and briefly with a fork. Add 1 tablespoon of the sugar; stir again. Let mixture stand until the yeast foams, about 5 minutes. Add the remaining sugar, butter, cream, milk, saffron, salt and eggs. Fit mixer with the paddle attachment and beat well on medium-low speed until combined. Remove paddle attachment from mixer and fit with the dough hook. Add flour 1 cup at a time mixing well with each addition to keep the dough smooth and satiny. You may not need to use all of the flour.
  2. Cover and refrigerate for a minimum of 2 hours, or up to 24 hours.
  3. Preheat oven to 375F. Line two baking sheets with parchment paper.
  4. Turn dough out onto a lightly floured surface and cut into 24 even pieces (about 2-inches square). Roll each square into a long rope, about 12-inches long. Curl each end of a rope in opposite directions, creating an "S" shape (or a backward "S" shape). Lift the bun onto the parchment; repeat curling with remaining dough ropes until there are 12 per baking sheet.
  5. For the glaze, beat the egg in a condiment cup and stir in the milk. Brush each bun with the glaze then sprinkle over pearl sugar.  Place sheets in a warm place to rise until doubled, about 45 minutes
  6. Bake for 15 minutes, or until golden brown and puffy.
Heather's notes:
I use a stand mixer with a dough hook to make this bread, but it requires no intensive kneading. You can stir the ingredients by hand until a satiny, soft (but non-sticky) dough is formed.
You may not have to use all the flour. I used a little less than 4 cups. I stopped adding flour when the dough started pulling away from the sides of the mixing bowl (while beaten with the dough hook).
I place the sheets of buns on the range-top of my preheated oven. The heat from the oven encourages the dough to raise.


Tres Leches Cake Cones

$
0
0

Our family tradition is to make Snow Cream on powdery winter days. There's something about its sweet, creamy flavor that reminds me of Tres Leches Cake (no doubt it's all that sweetened condensed milk and vanilla in the three milks mixture). I had the idea to marry the two as a cake-cone, and since the paper cones are made to hold ice and syrup, I figured they would hold up to the saturation of tres leches.


What I wasn't sure about - the baking part. I've never baked cake in a paper cone before, so I didn't know what to expect. I was afraid the centers would be under-cooked due to the shape, but I'm happy to say that these baked up just perfectly!


If you decide to try baking in paper cones, I'd suggest getting some sturdy cones like these. Even though they held up beautifully through baking and all that luscious milk saturation, I decided to double up on the cones just in case. Hand-held, they felt a little sturdier, so you'll probably want to have a few extra just in case you feel the need to double-up, too!


I had no special equipment to make these, just my standard size cupcake pan. I lined the cavities with bunched-up aluminum foil and nestled each cone's pointed end into the foil so that they stood upright. I'm sure it would be more convenient to have something like this 
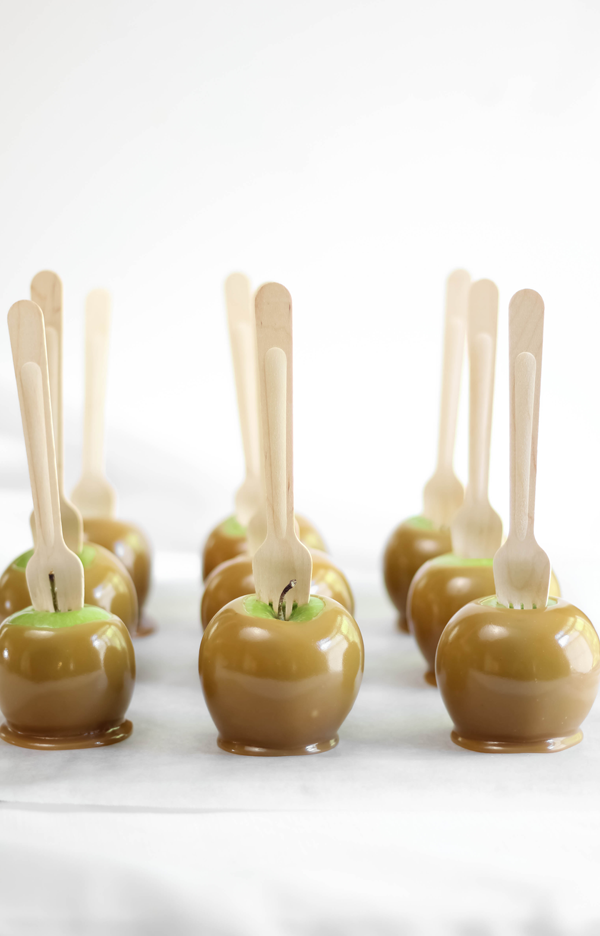
in which to display them, but I did just fine without. They look just as pretty arranged together standing upright in a clear glass bowl or separately in glasses. A fork or spoon makes it easier to eat these, so stick one in each cake before serving.

Tres Leches Cake Cones
[click for printable recipe]
Yield: 16 cones
Source: Adapted from Nestle kitchens cupcake recipe
Prep: 30 minutes, total time 4 hours

Paper snow cones are needed for this recipe, or, if you'd prefer, they can be baked as cupcakes (yield 2 dozen). Be sure to use sweetened condensed milk in the sauce, not to be confused with evaporated milk.

Sponge cakes
2 cups all-purpose flour
2 teaspoons baking powder
1 teaspoon sea salt
6 egg yolks
6 egg whites
1 1/3 cups granulated sugar
1/2 cup whole milk
2 teaspoons vanilla extract

Tres leches sauce
14 oz. can sweetened condensed milk
2/3 cup lite coconut milk
1 cup heavy cream
2 teaspoons vanilla extract

Topping
1 cup heavy cream
1/4 cup granulated sugar
1 teaspoon vanilla
16 red maraschino or glace cherries
Confetti sprinkles

  1. Preheat oven to 350F. Line each cavity of one (or two if you have them) muffin tin with crumpled aluminum foil. Press paper cones down into the foil so they are securely standing upright. Set aside.
  2. Whisk flour, baking powder and salt in a medium bowl. Beat the egg whites in a separate large mixing bowl until soft peaks form. With the mixer running add egg yolks one at a time; beat well after each addition. Alternately beat in flour mixture with milk, beginning and ending with the flour mixture. Beat in the vanilla extract. Fill the cones with batter only halfway - if you overfill, later on in the recipe the tres leches sauce will overflow and make a big 'ol mess! Bake for 15 minutes, or until the cakes spring back when pressed in the center. Remove cakes from oven and let them cool in the pan. Gently poke holes in the cakes with a wooden skewer - be careful to to avoid poking holes through the paper cones. 
  3. For the sauce, whisk together all the milks in a 4 cup measure. Pour 2-3 tablespoons of sauce into each cone; let stand until liquid is soaked into the cakes. Pour another 2-3 tablespoons of liquid into each cone. Cover and refrigerate for 4 hours, or overnight.
  4. For the topping, beat the heavy cream until soft peaks form; gradually add the granulated sugar and whip until stiff peaks form. Beat in vanilla. Transfer whipped cream to a piping bag fitted with a large star tip. Pipe swirls of topping on each cake. Garnish with a cherry and confetti sprinkles.
Viewing all 914 articles
Browse latest View live